Compression stockings work! There's no doubt about it. My wife has been diagnosed with Osteopenia a few years back. This is a condition where you lose bone mass and your bones get weaker. This happens when the inside of your bones become brittle from a loss of calcium.
Vitamin and mineral supplementation was advised and because there was pain and swelling in her lower legs, compression stockings were suggested. Walking, as a form of exercise to strengthen both muscles and bone, was encouraged.
She uses the Oppo brand of compression stockings with a compression level of 34 to 46 mmHg. Shown below is the type of compression stockings she bought.
They're thicker than traditional hosiery, durable and snug. They're classified as Extra Firm and provide good strong support. Because they're knee-high and open-toe, they're still comfortable even when the weather is warm.
Problems with Wearing Compression Stockings
To wear compression stockings easily and quickly, takes a bit of technique, unfortunately. These stockings, especially when new, are almost impossible to wear without assistance. They're simply too tight!
I remember the first time I saw one, I struggled and it took me around 20 minutes to get it on - and this is just for one stocking!
The instruction leaflet that comes with the product makes it look unbelievably easy. Videos I see on the internet show models wearing them, nonchalantly and smiling. But these models are thin with skinny legs!
There are devices that are touted to help one wear compression stockings in a jiffy. They seem to work, but I'd venture to guess that they only work with stockings made with thin fabric. It's either that or the rated compression of the stocking is very low.
Proper Technique to Wear or Don Compression Stockings
There are probably other efficient ways to don or wear these stockings. The technique I learned is for me, the easiest and quickest. This is something I learned after putting stockings for my wife for several months.
Yes, getting assistance from someone is the quickest way possible. Putting on one stocking takes less than a minute - roughly 40 to 50 seconds. Removing a stocking takes less than 10 seconds.
The video at the end of this article explains the procedure and you may time it even. There is no pause in the demonstration, and no, the recording wasn't speeded up.
The advantages of this technique are as follows:
The patient can wear the stockings comfortably on the bed at home.
The patient need not exert much physical effort especially if she has a medical condition, e.g. obesity, hypertension, and other conditions that may limit movement.
Because removing the stockings are done at the bed, the patient may proceed to elevate her legs (as is usually suggested) cnnveniently and immediately.
Compression Stockings
Here's a brief rundown on the compression stockings that we use.
The pair of open-toe stockings come with a foot slip as shown below. There is only one because you'll be wearing the stockings one at a time. The foot slip is made of nylon. It's quite durable and is smooth.
It is worn first before the stocking and is removed when the stocking has been worn past the heel area. The foot slip has a wide flap near the heel area and that flap covers the entire heel when worn.
Below is the stocking with the heel and the cuff shown. The foot part of the stocking appears short because it is "open-toe". Typically, it starts at the ball of the foot when worn.
There are a couple of silicone bands inside the cuff of the stocking. These silicone bands prevent the stocking from slipping or going down your leg. They're like smooth rubber bands on the inside of the stocking cuff.
Prepping the Stocking
Below is the technique I follow to prep (or prepare) a stocking before I wear it on the patient.
Turn the stocking inside out. Insert your hand into the stocking cuff. Reach for the front end, hold it, and then pull back. After doing so, the silicone bands on the cuff are now outside.
Still holding the front end of the stocking, push the front part with your fingers inwards. This will create a fold just to the point before the heel.
Insert 2 or 3 fingers of both hands into the opening. Pull apart so you have a wider opening. This is the part of the stocking that will be worn on the foot of the patient.
How to Wear Compression Stockings
Keeping in mind the prepped stocking, you're now ready to put the compression stockings on the patient.
Have the patient lie on the bed with the knees bent. Bending the knees allows the patient to be nearer to you as you put on the stockings later.
Let the patient wear the foot slip as shown below. Notice the flap of the foot slip extends beyond the patient's heel.
Prepare the first stocking as explained earlier. Be sure to pull apart the opening with your fingers inside. This is especially if the stockings are new and tight. You'll need plenty of room to get the patient's foot inside the opening.
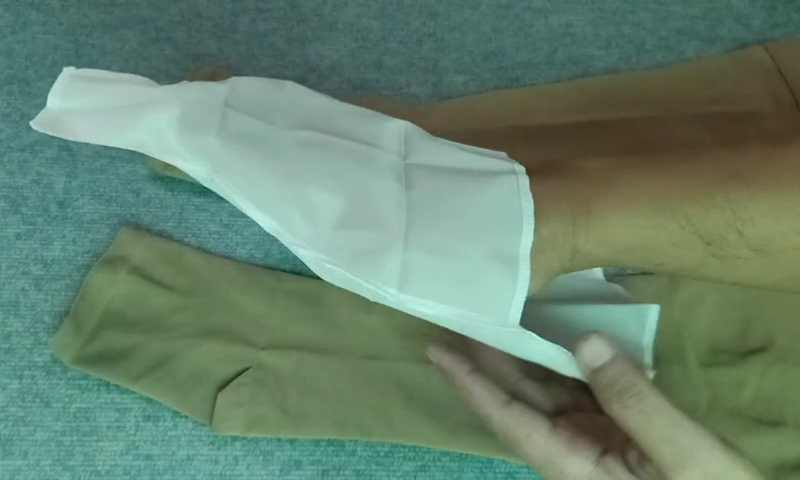
Place your foot on the bed. Let the patient rest her ankle or calf on your knee. Put the stocking on the foot up to the point just before the patient's heel (as shown below). There's no need to pull it over and beyond the heel at this time.
Hold the cuff and be ready to put it on the foot. As the cuff opening is bigger than the toe opening, you'll be able to pull this over the patient's heel. Notice the foot slip dangles lower than the heel.
Pull the cuff down under and past the heel.
Pull the cuff forward to how far it will go towards the knee.
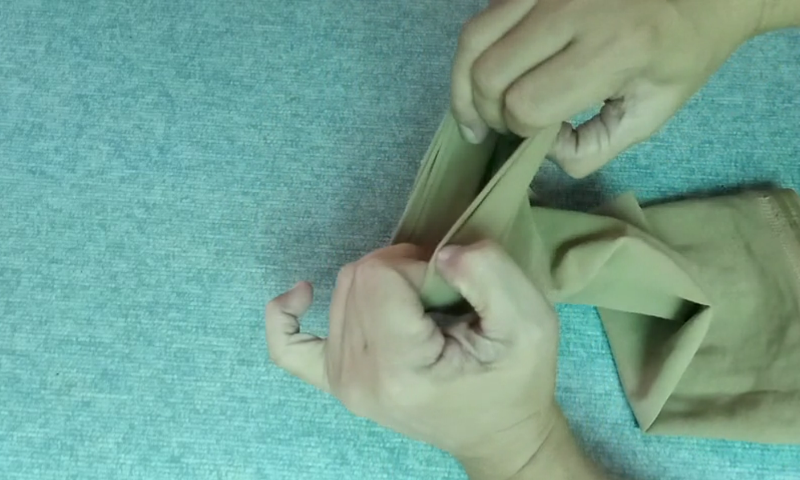
Pinch the bunched material at the sole (below the patient's foot). Avoid using your finger nails in this. You could also use rubber gloves to allow you to grip the stocking material.
Pull the material and move it towards the leg. Do this pinching and pulling repeatedly until the loose stocking material at the foot has been transferred to the leg part.
Massage the foot to smooth out wrinkles. Adjust the heel part to correctly position it as needed.
Pull out the foot slip. The foot slip should slide out easily. As you pull it out, the front open-toe part goes with it and will cover the foot's instep and sole nicely.
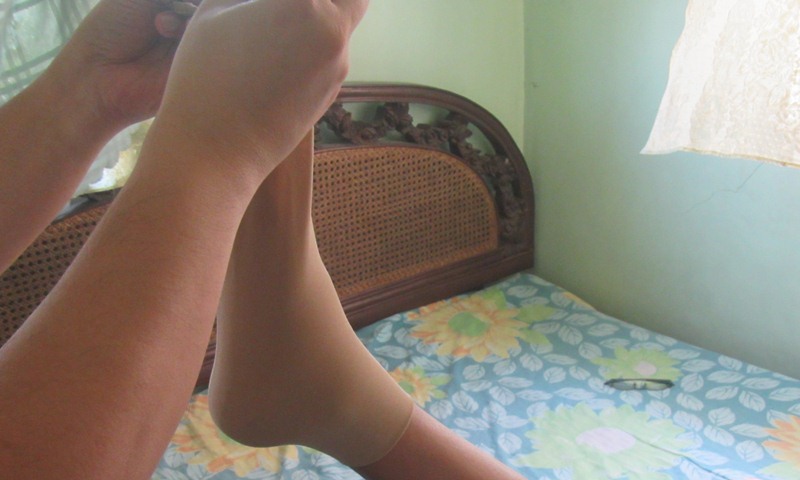
Let the patient pull the cuff and adjust it as needed. She will also be able to massage and smooth out remaining wrinkles on the leg part of the stocking. She could stretch her ankle to further stretch out the stocking in that area.
How to Remove Compression Stockings
If putting on the compression stocking was quick, then removing it is even faster. It is just a two-step technique: 1) Pull the cuff off the leg part, and 2) Scoop out the remaining part of the stocking. This can be performed in less than 10 seconds. This will be discussed below:
Again, have the patient lie on the bed with the legs bent as shown below. Place your feet on the bed and rest the patient's ankle or calf on your knee. Reach for the stocking cuff and hold it with both hands.
Pull the cuff all the way out towards you - as far as it will reach.
With your finger tips, scoop up the remaing stocking material left on the patient's calf near the ankle. Once you get a good grip, pull the stocking under the patient's heel.
Continue pulling the stocking material all the way out. This would be just one pulling motion to remove the stocking completely.
Video Tutorial
Shown below is the video tutorial for this article:
I hope liked this article, and don't forget to subscribe to my channel!


Go ahead, post your comment below!