Santi recovered from Canine Distemper five months ago, and of course was given his much needed vaccines thereafter. Sometimes I wonder if any of the distemper symptoms would come back. So I plan to give him lots of exercises to keep him fit and strengthn his immune system. Also, as they say, a tired dog is a happy dog.
Cheap Long Leash for Recall Training
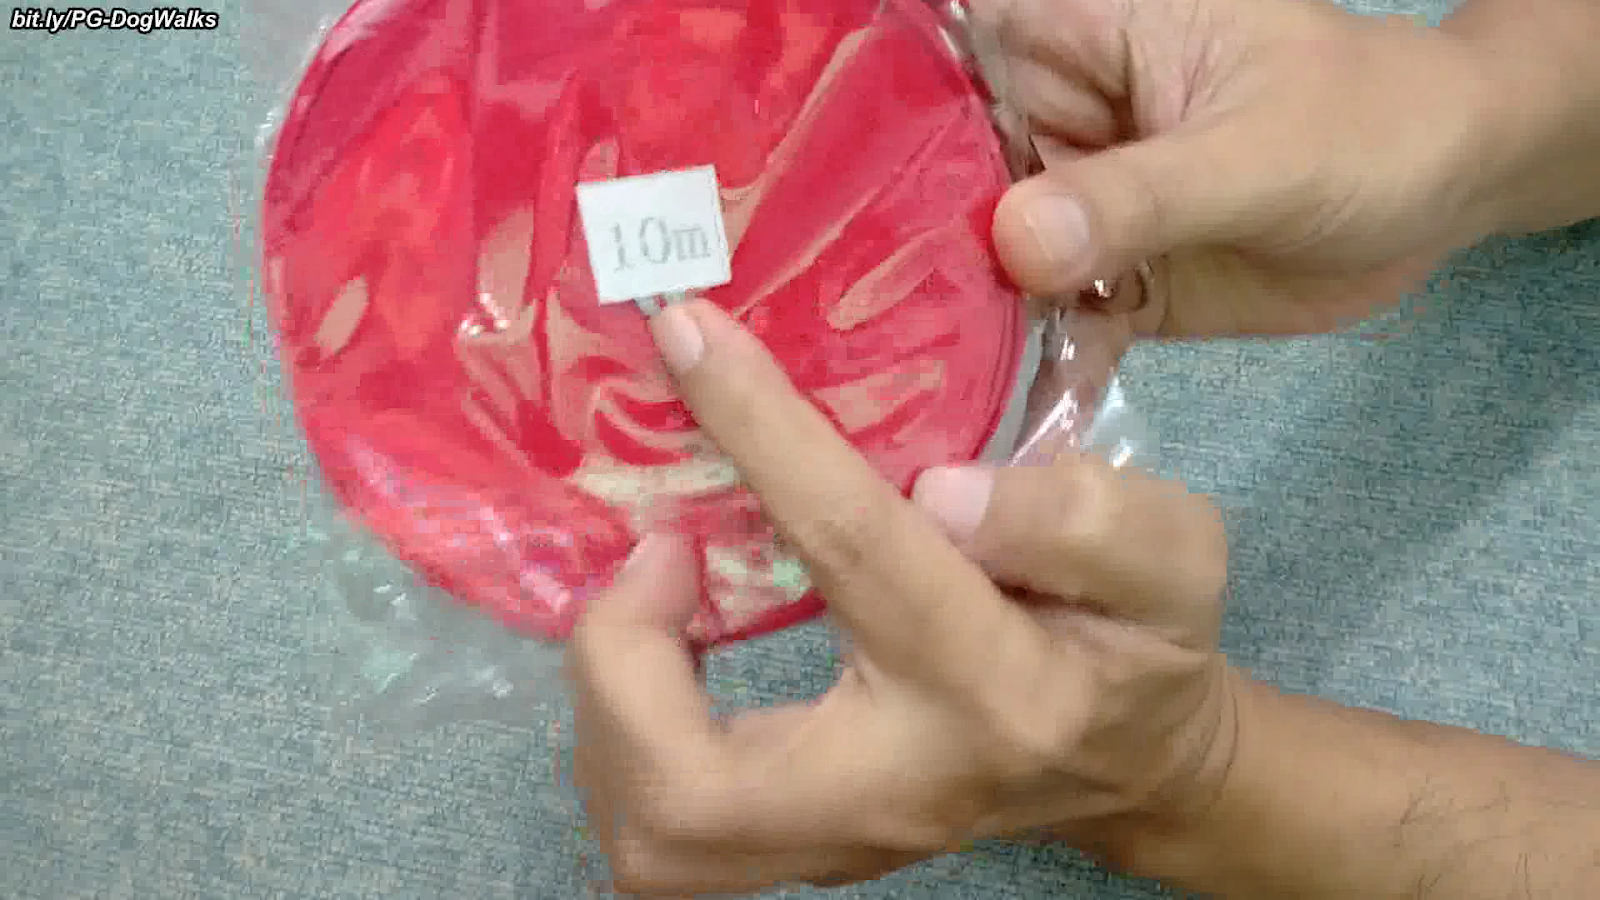
Costing Php 149, the long leash I bought is inexpensive. It's a flat nylon leash and measures 10 meters long as shown below. Why did I choose 10 meters instead of just 5 meters or even much longer?
I looked at the distance which is the average width of house lots here. 10 meters seem to be just right in that the dog may still hear me call him.
The long leash is basic. It has the standard clip at one end. It is a swivel eye snap hook with a bolt. At the other end of the long leash is a simple loop handle made of the same nylon material.

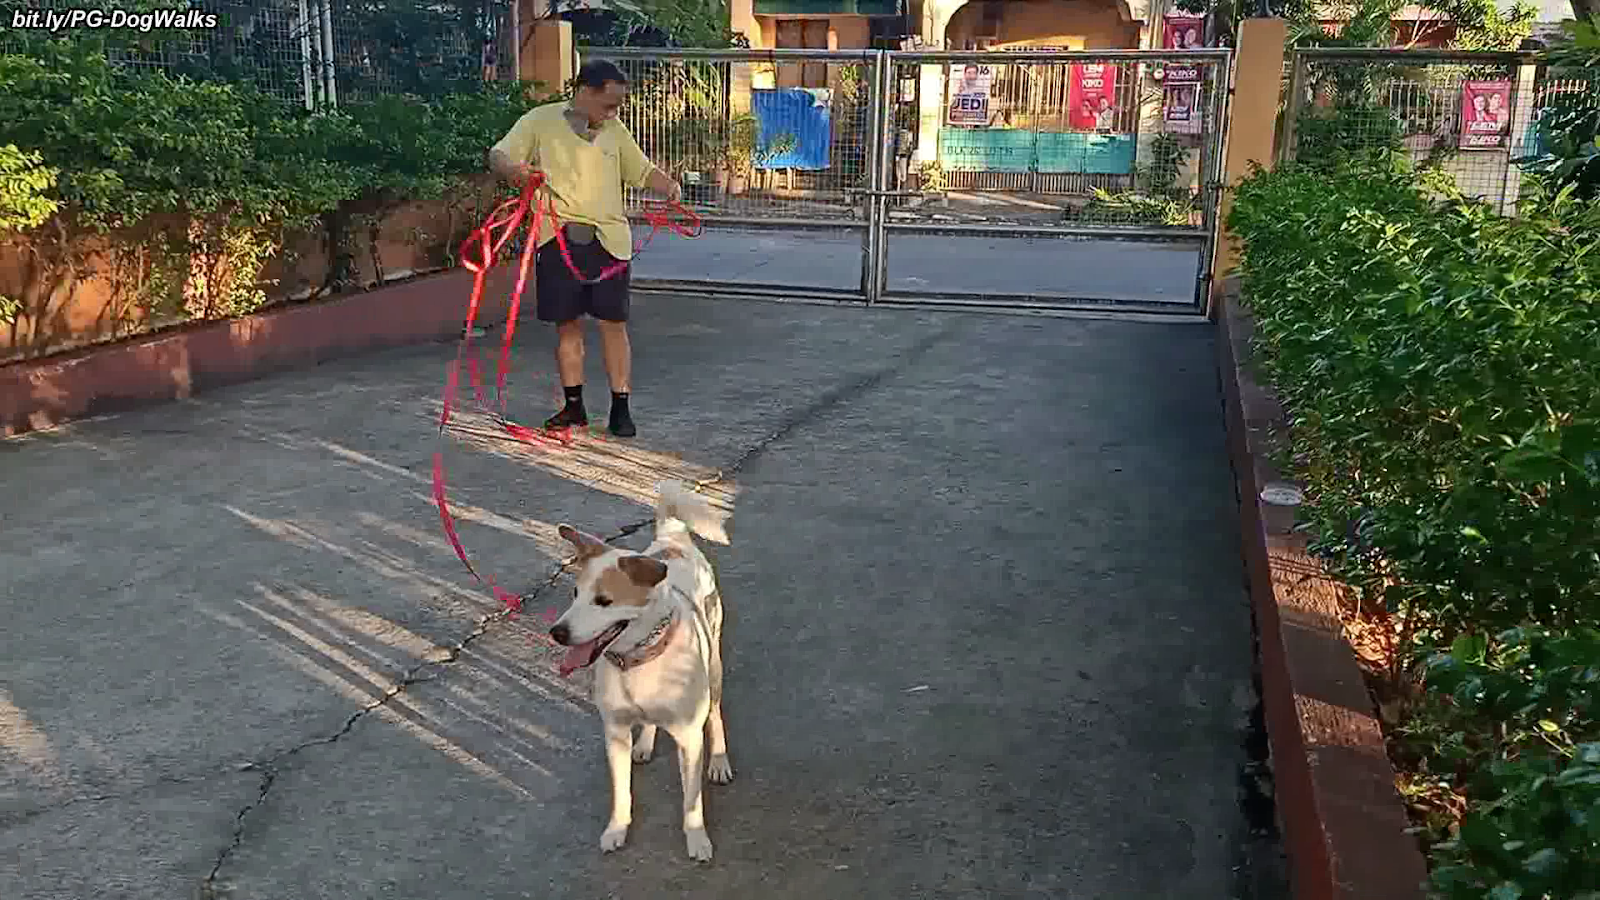
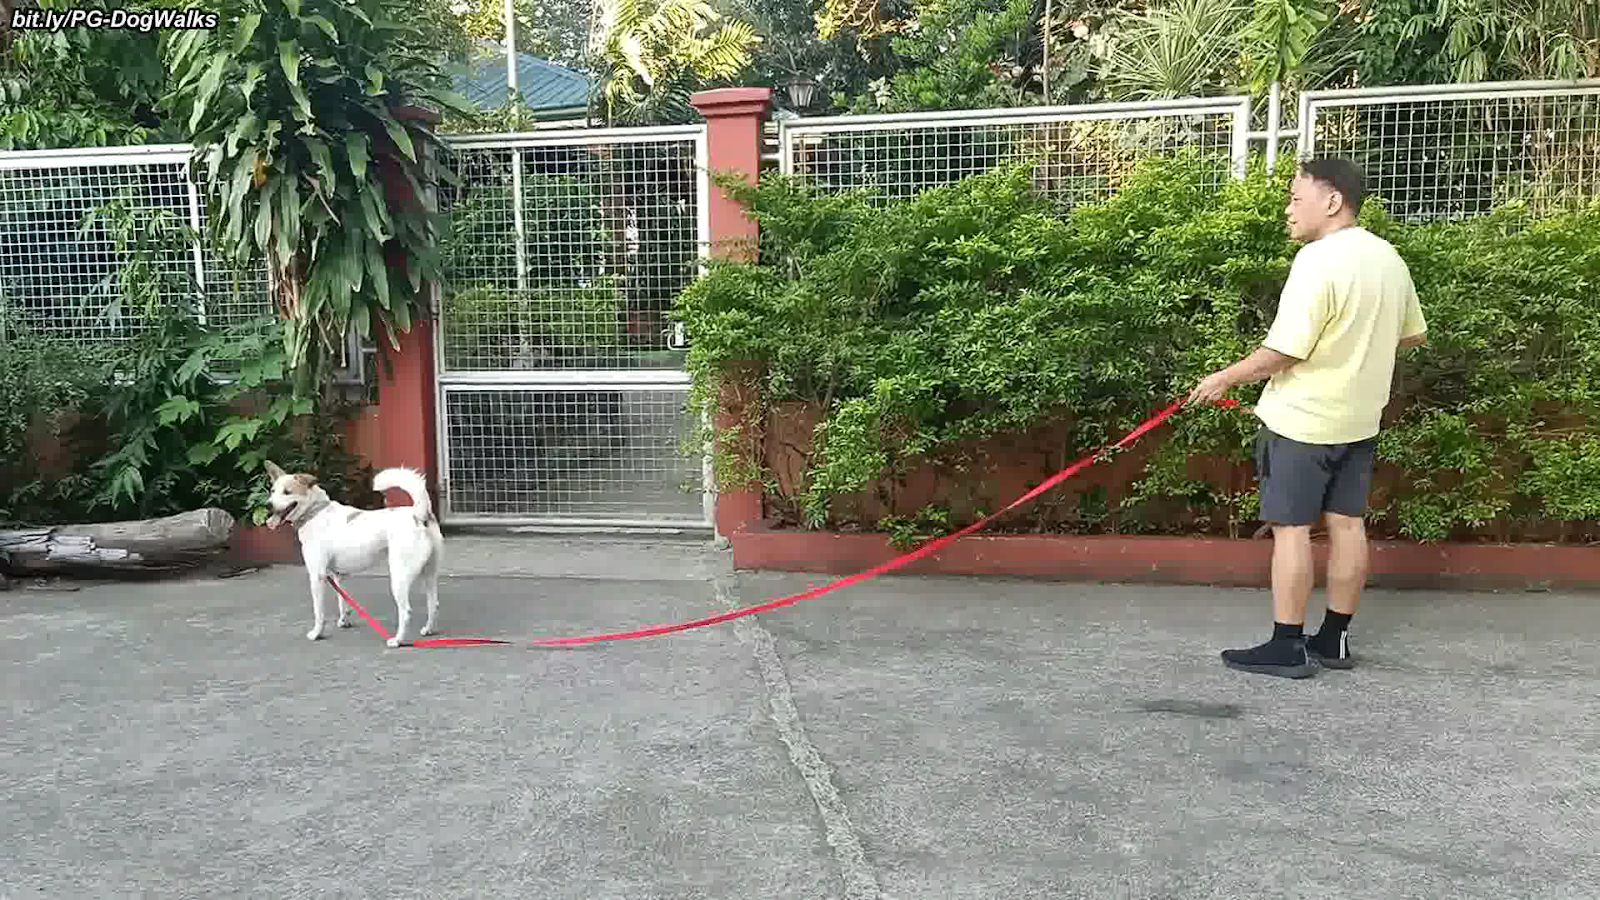
Excited to try out the long leash, I put it on Santi's prong collar at the park. I was happy that Santi responded well with my recall commands. I suppose it was because his distance from me was almost always 4 or 5 meters.
So that is one reason why I kept the distance short - we were just starting out and I was playing by ear. Another reason I kept the distance short is because of thick hedges that lined the gardens. I didn't want Santi running and weaving that long leash would wrap around the heldge plants.
Unfortunately though, I found that the 10-meter leash was a bit to handle if I constantly used only just 4 meters of it. As shown above, I kept collecting and rounding up the leash material that was dangling and dragging.
How to Make the Plastic Case for the Leash
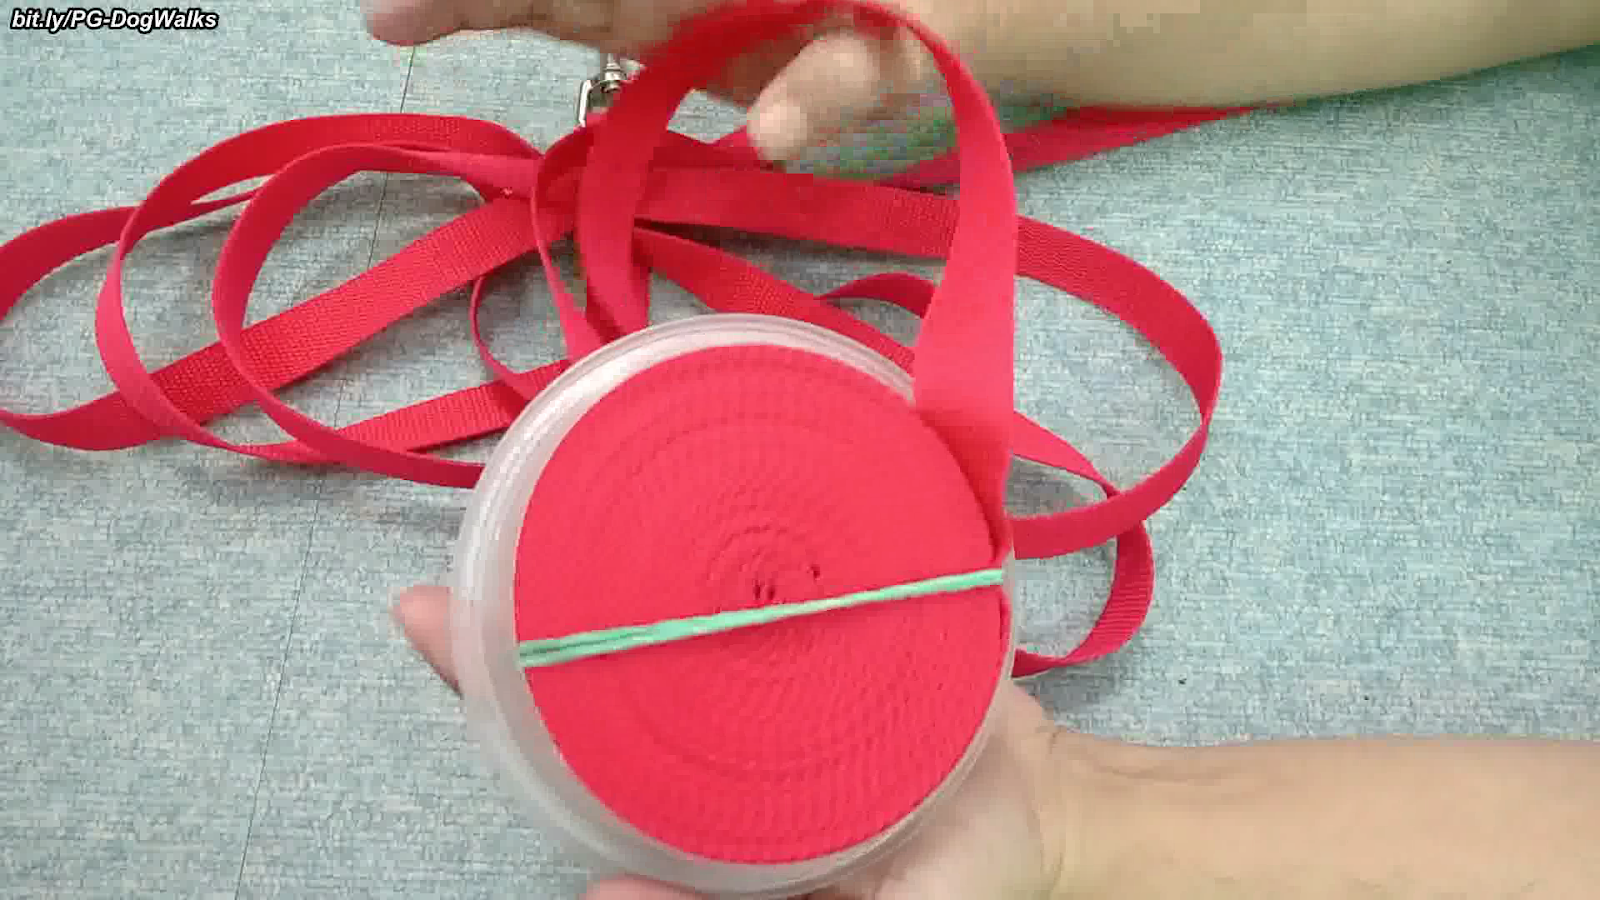
In our beginning training sessions I was using a shorter line of around 4 meters. So I thought of rolling the unused leash material (6 meters) and then putting it in my pocket. For this, I put rubber bands across the roll as shown below.
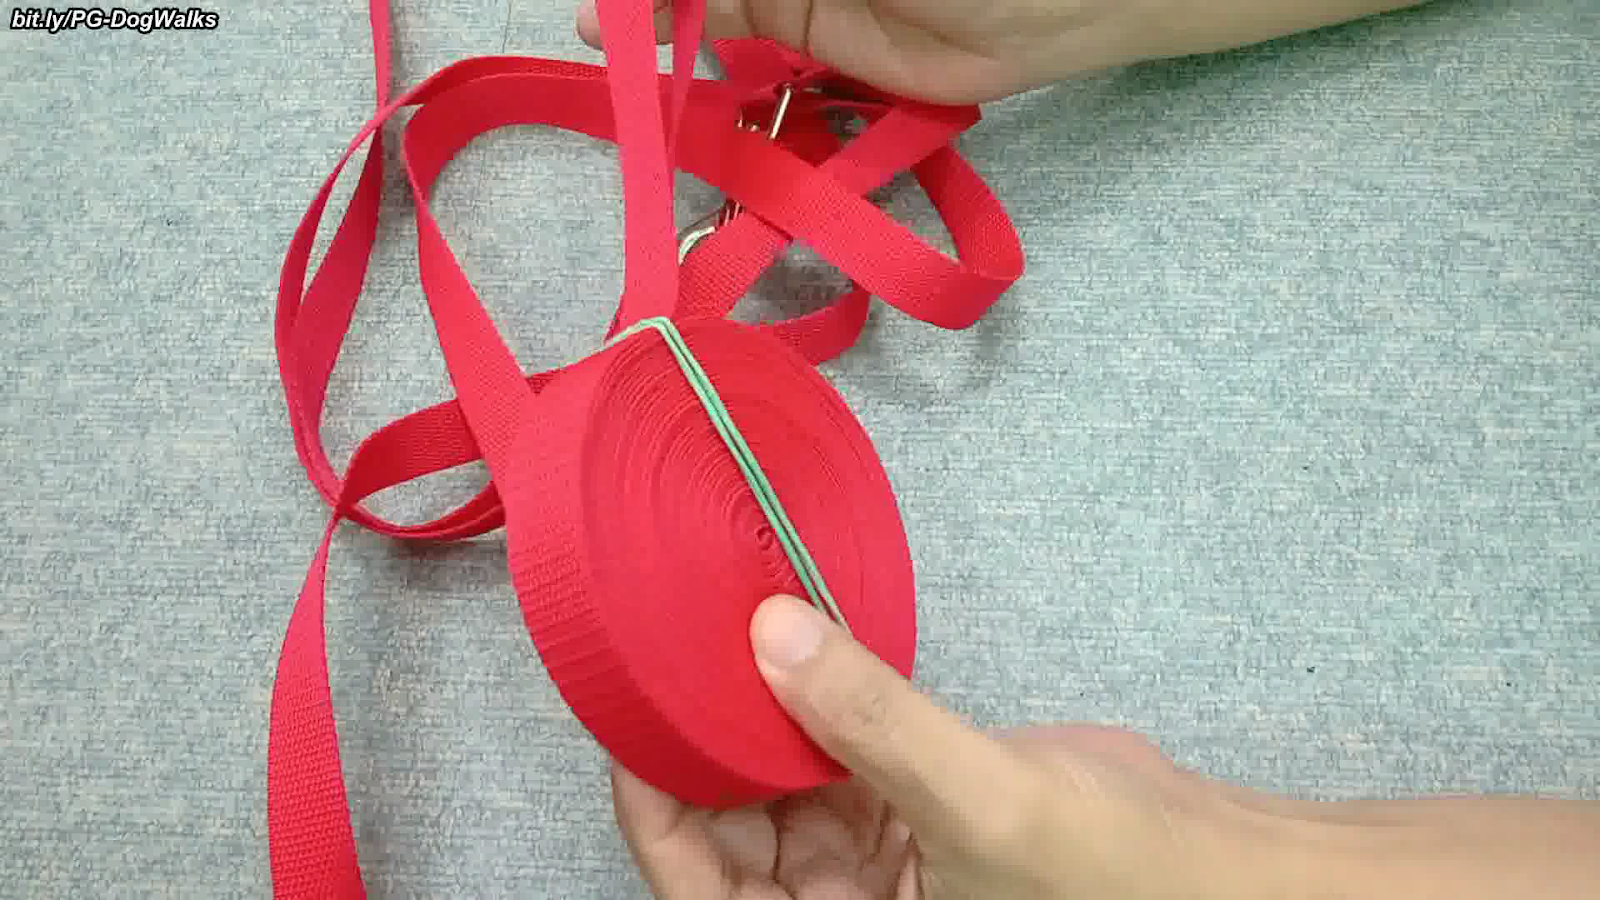
Unfortunately, the rubber bands are not enough. A slight tug on the free leash and the rubber bands move. This then unrolls or unravels the rolled-up leash.
The only way I could think to secure the rolled leash to keep it from unraveling is to encase it. So we'll build a plastic case that's easy to make.
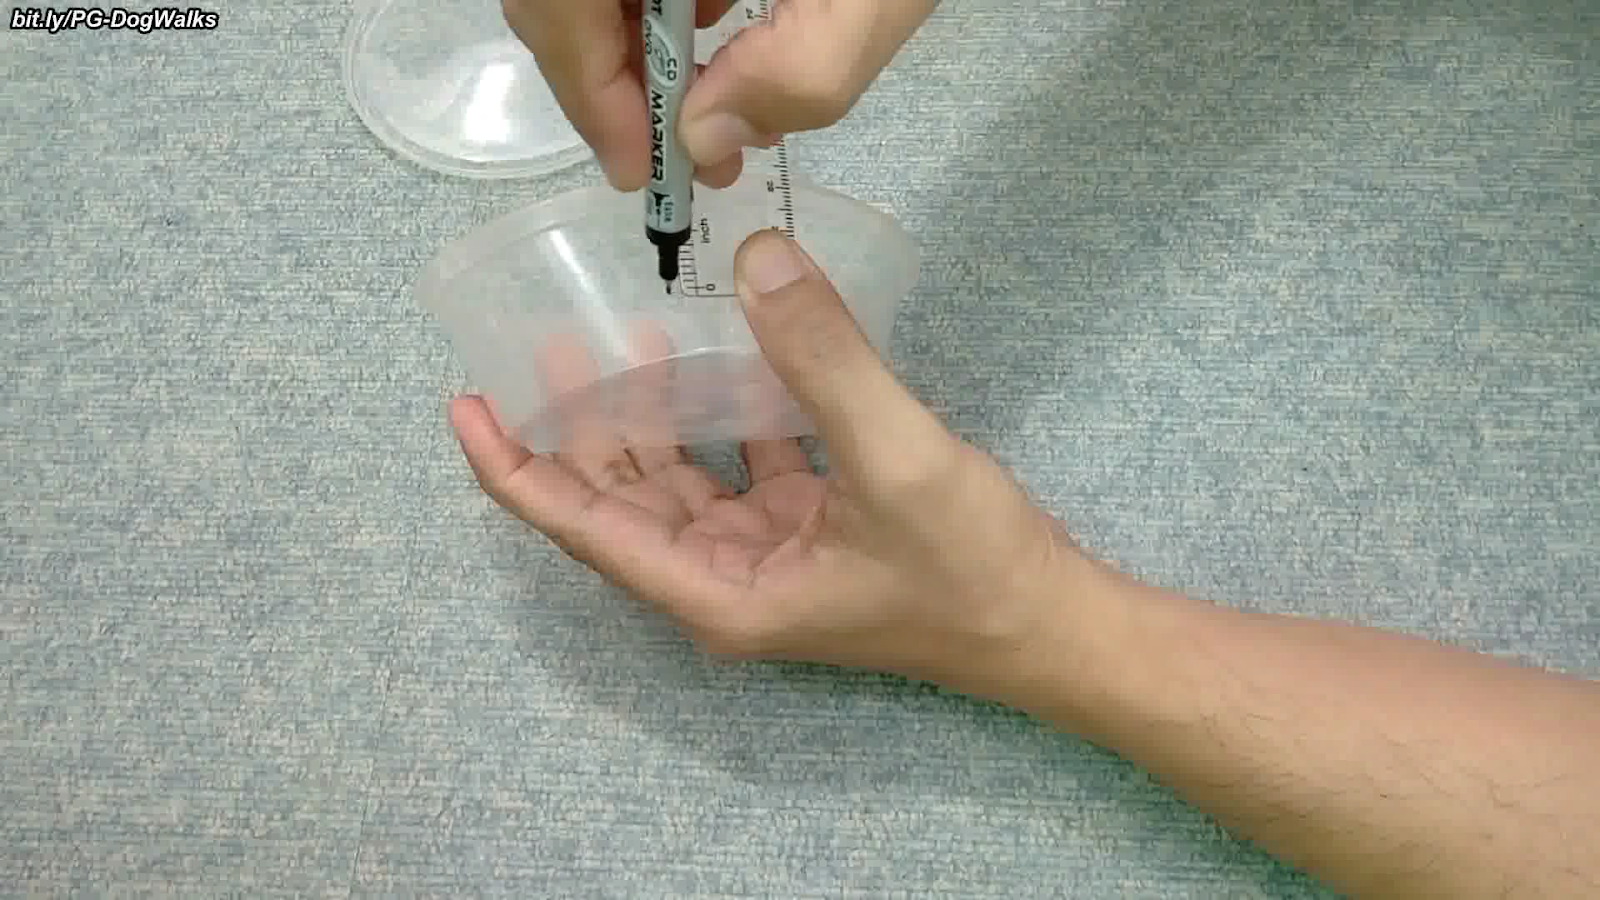
- First, we measure the width of the leash. This will determine how big of a case that we'll be making. This is a flat leash and that's easy to do. This leash is 3/4" wide.
-
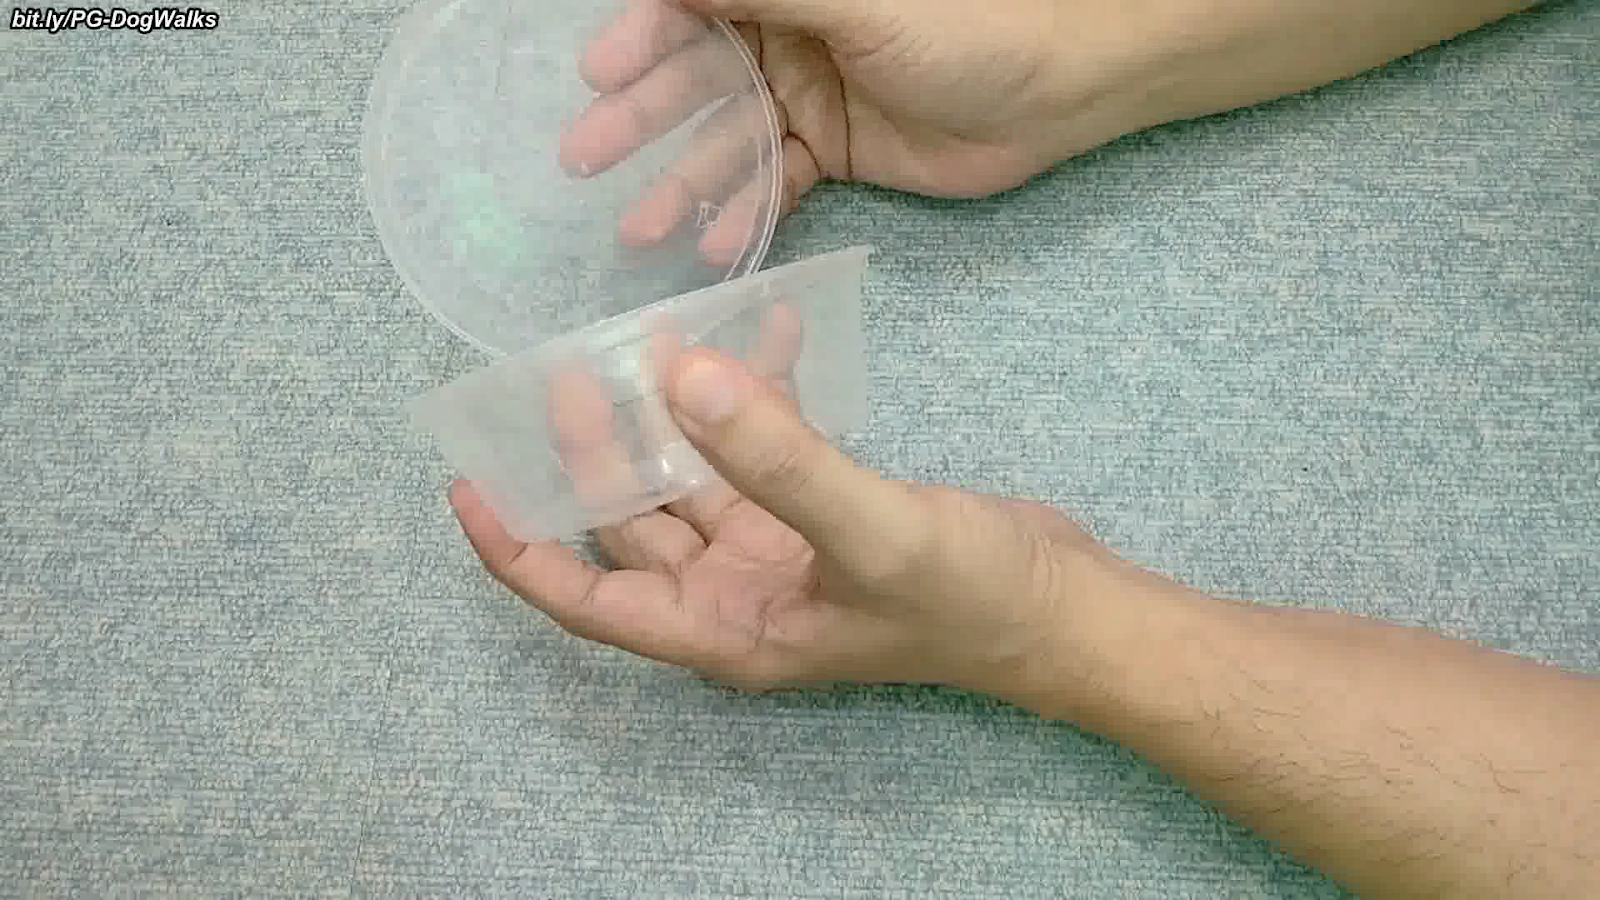
Then we look for a round plastic tub. I'd like to see the inside and so a transparent one like the one below is good. This tub has a clear plastic lid on it. This lid snaps on the tub although any other tight fitting lid or cover would do.
-
With a ruler, measure 1 inch from the top of the tub downward. The leash is 3/4 inch wide and so we're putting in roughly 1/4-inch allowance for the plastic case.
-
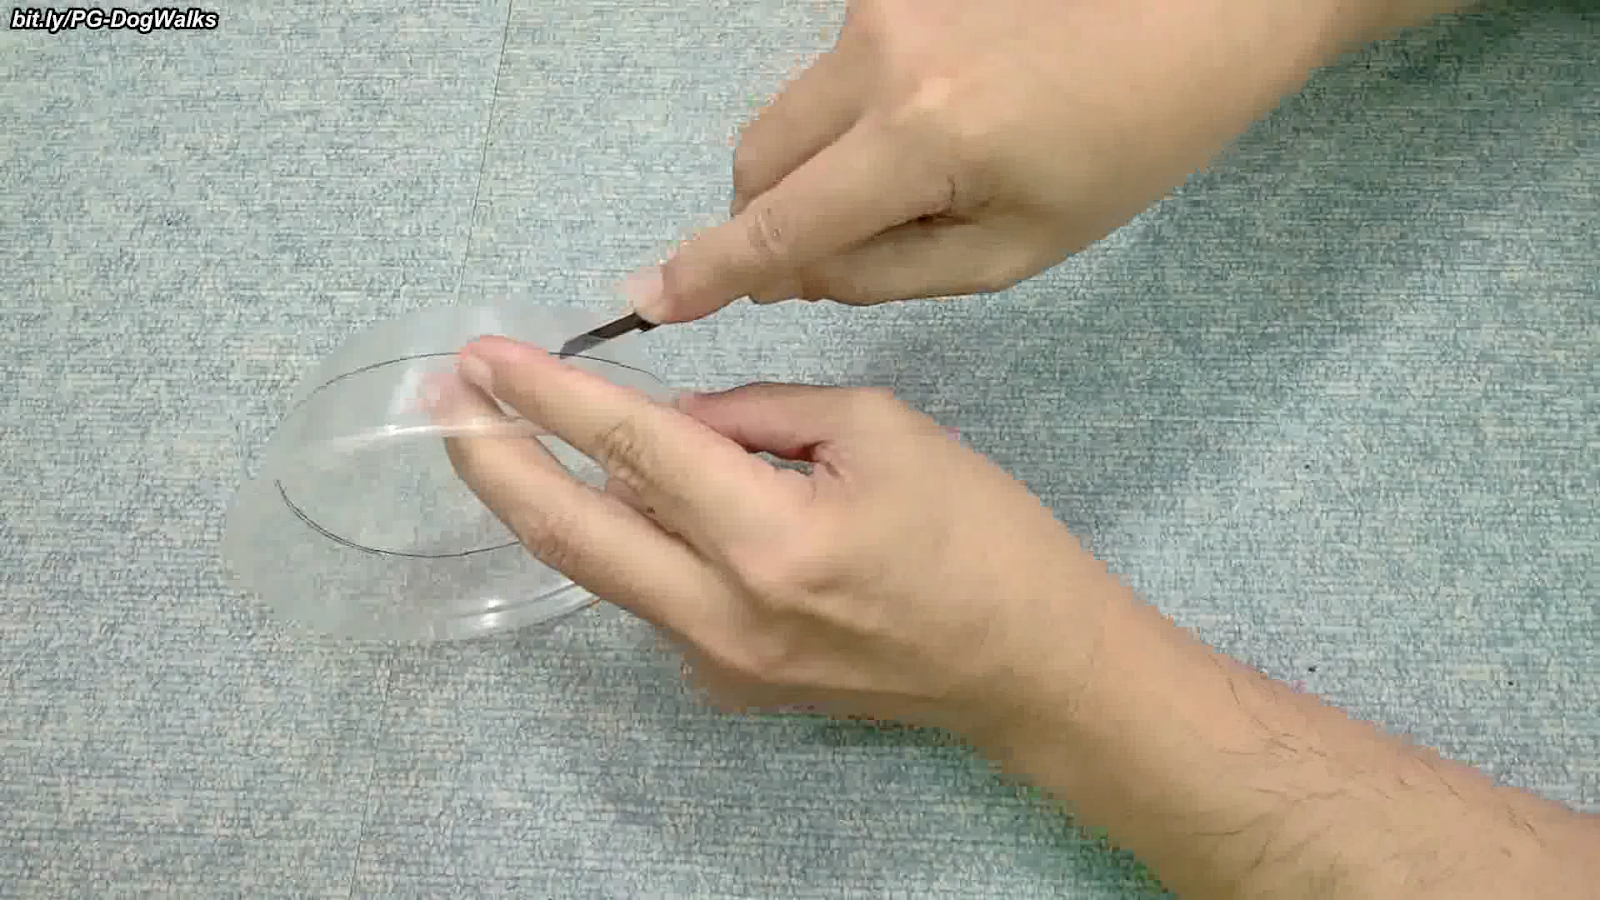
With the 1-inch mark, draw a full circle all around the plastic tub. It doesn't have to be a perfect circle but reasonably flat and level.
-
With a cutter or sharp knife, make a slit on the plastic tub along the marked circle or just below it. It should just be long enough for a pair of scissors to be inserted.
-
With a pair of scissors, cut along the marked circle all the way around. Again, keep the cut as flat and level as possible. Discard the cut lower part of the plastic tub.
-
Even if you return the lid to cover, it still snaps on perfectly. This will be the plastic case for the rolled leash. Notice that the sides of the tub tapers from the rim to the cut line.
-
Remove the lid and lay it on the table facing up. Pass the leash roll through the cut opening. Ensure that the leash roll's diameter will fit snugly inside plastic case. Once inside, position it so that the plastic tub without the lid encases it.
-
With the leash roll inside the tub, position the tub on the lid and press it so the lid closes and snaps into place.
-
Press the lid on the tub so it snaps on completely. The plastic case now safely secures the leash roll inside. The rubber bands that are wrapped across the roll provide additional traction to keep the roll in.
-
Even as I shake and dangle the plastic case from the free leash, the leash roll inside doesn't unravel. The closed lid of the plastic case prevents the leash roll from falling off from one side while the tapered sides of the case prevents it from falling off from the other side.


Testing the Plastic Case of the Leash Roll
Back at the park to test the plastic case, we find that it fits quite nicely in my shorts pocket. That means I can safely use the leash knowing that the unused rolled leash is secured inside.
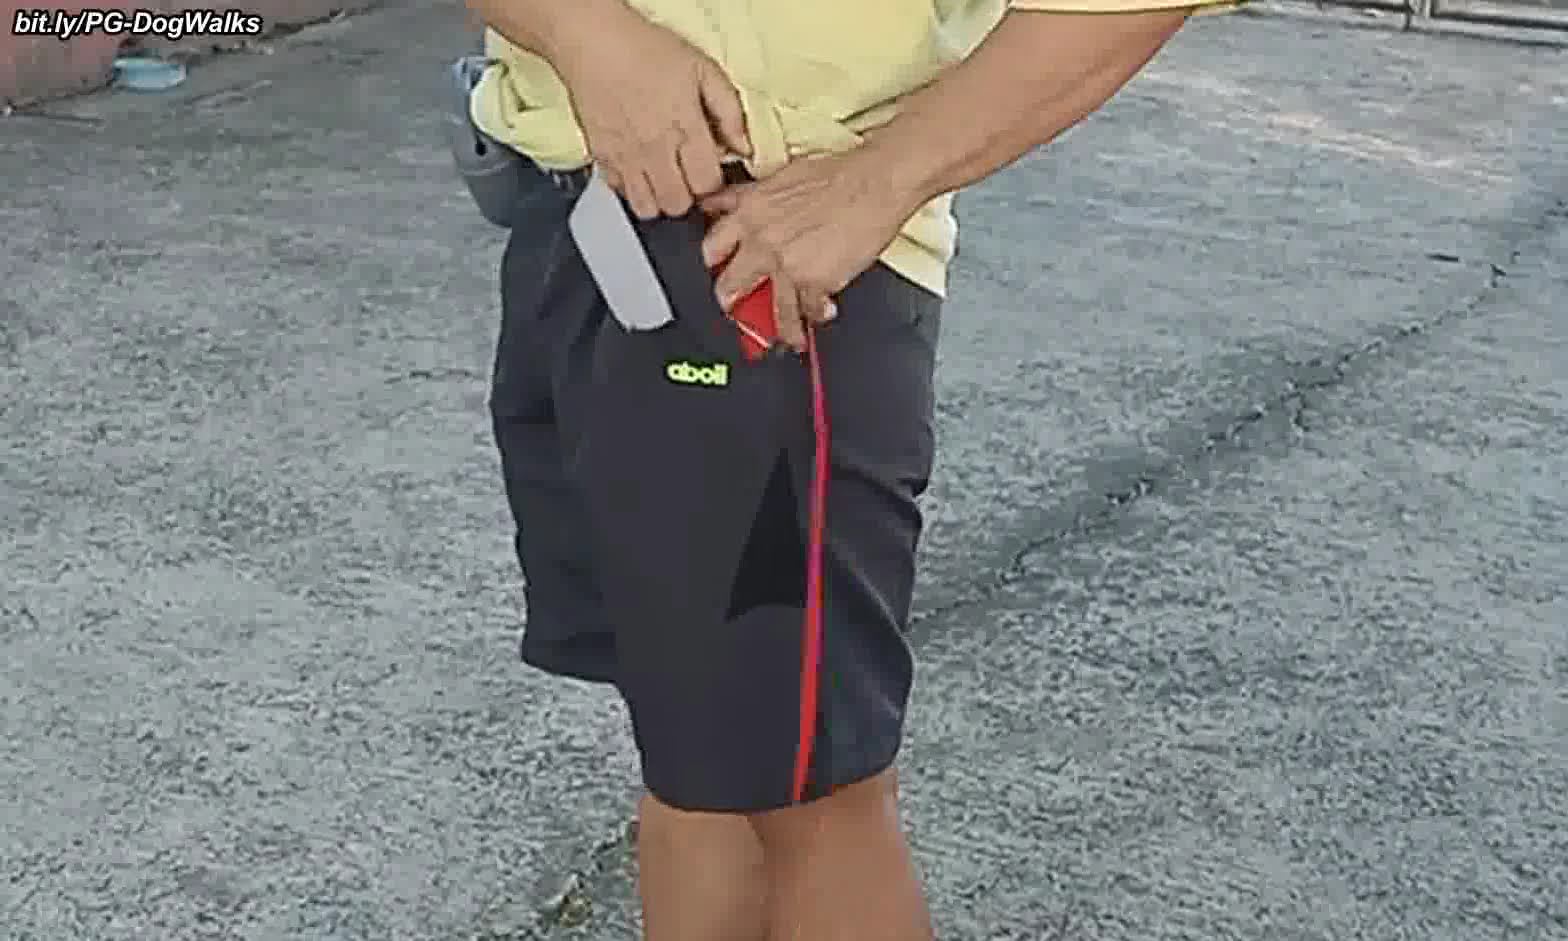
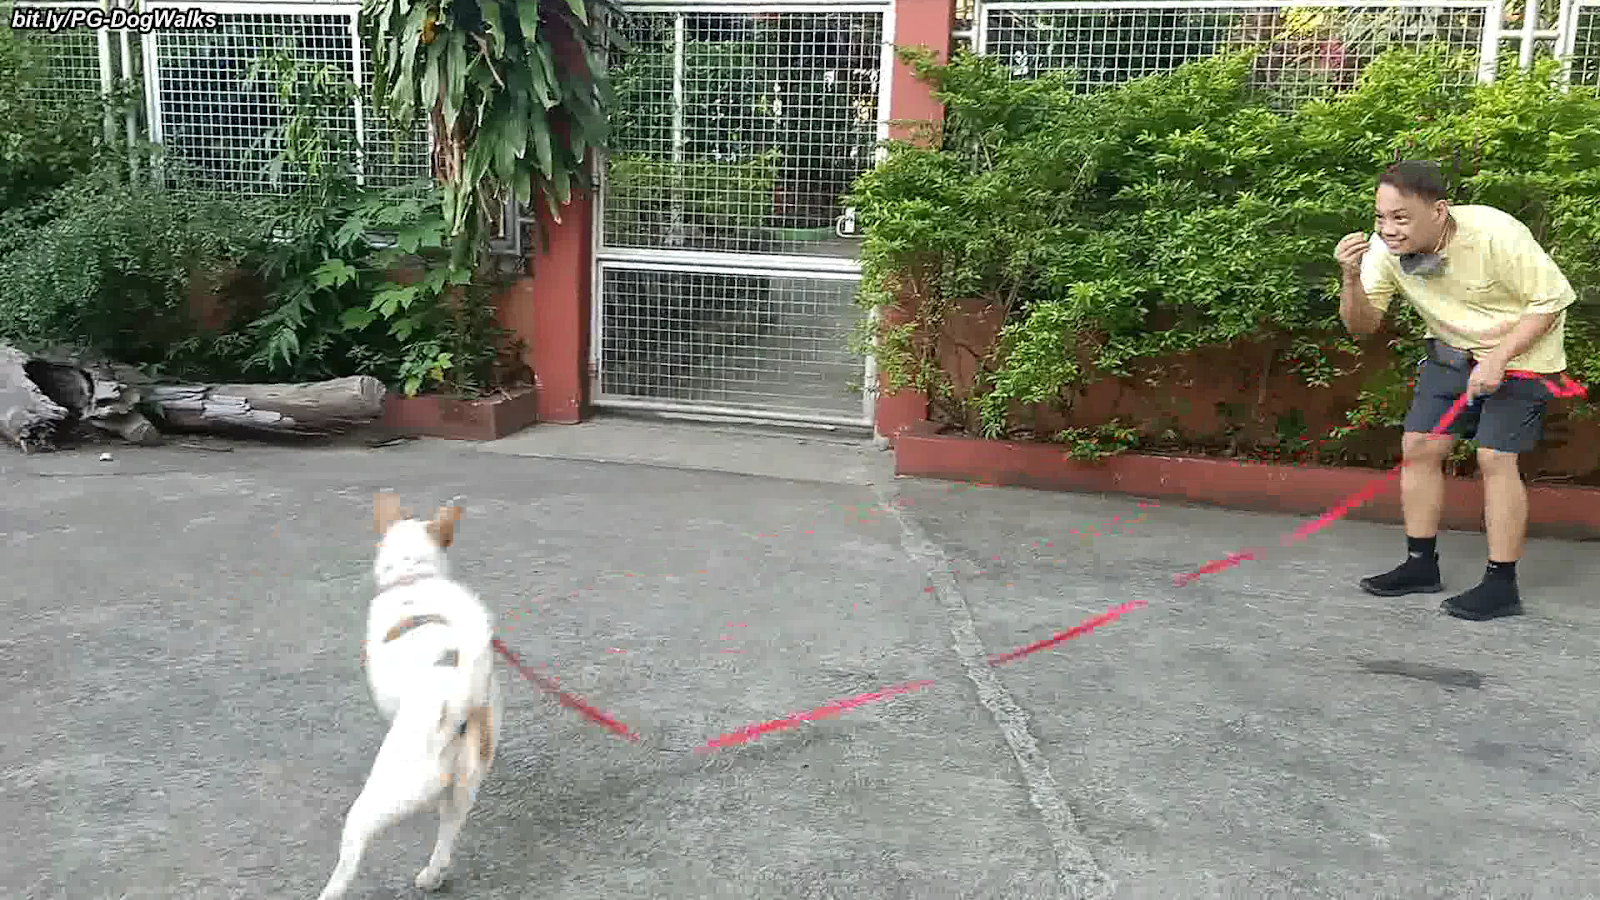
Here is the shortened long leash in action. You can see that I only have 4 meters of the long leash that's exposed and usable. The rest is securely tucked inside the plastic case and inside my shorts' pocket.
Below, Santi quickly reacts after I gave the recall command and offer a treat in return. Now, it's much more convenient and easier to focus on recall training without having to drag, dangle, and collect loose material from the long leash.
Eventually though, when we progress to really longer distances, I will be removing the leash roll from the plastic case and utilize the entire 30 meter length of the long leash.
Video Tutorial
Watch the video tutorial below for this article.
Happy Dog Walks!


Go ahead, post your comment below!