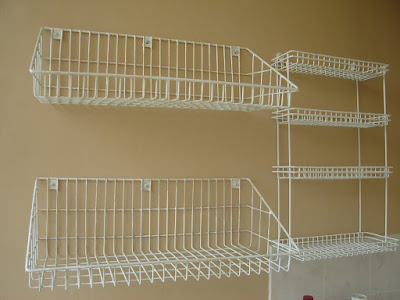
That meant walls in kitchen, laundry, garage and even in the bedrooms.
When our now 2-story house was constructed, I thought we'd have all the storage space we needed. I even considered throwing these trays away since most of them have rusted and had chipped plastic coating. Well, good thing is that I didn't.
During the week, I've thought of ways to revive these trays and locate good spots around the house where to mount them. I only chose two areas.
Here's the "dirty" kitchen area. You can see a part of the overhead skylight at the upper right.

And the laundry area.

"That's it?" you may ask, "for a whole week?". Well, there was a lot to do other than just mounting them on the wall. Like I said, some of the trays were heavily rusted.
The following had to be done to make them a bit decent.
- Peel the plastic coating of sections that have cracked. The plastic coating in these areas has become brittle hence the cracks.
- Use a cutter or a razor blade to smoothen the edges of the coating left on the trays. The raised edges are not only unsightly but rough to the touch too.
- After peeling off the affected coating, look for signs of rusting on the metal.
- For severely rusted areas, rub with sandpaper just to smoothen the surface a bit.
- Brush the rusted areas with a rust converter and allow to dry overnight.
- Paint over the metal areas. I used a white colored quick drying enamel for uniformity. Actually one of the trays had blue coating and I painted the entire thing white.
The above took a while to finish because of the drying time required. And that's just the preparation part.
To mount them on the wall, the following had to be done:
- Choose the right tray for the right spot. Ensure it does not obstruct any window or door swing.
- Choose the appropriate screws for the tray holes.
- Choose the appropriate expansion anchors for the screws.
- Choose the appropriate drill bit.
- Measure and mark the exact location of the drill holes.
- Drill the holes. I have a tip on how to drill the correct hole depth.
- Insert the expansion anchors.
- Position the tray and screw in.
Here are a couple that I added in the kitchen area:

A closeup of the attachments in the laundry area. I bought the one on the right as a shower rack at the rented house.
Eventually, it rusted. I cleaned, prepped and painted all of it white. It was originally blue.

Previously it was just set on the counter tiles - no screws. Now, I screwed it up high so the counter tiles below it on the wall can be cleaned easily.
One of the trays that posed a challenge in the mounting is the one below. Notice that two of the three screw holes on the left are too close to the window sill.
I feared if I used the drill bit for the regular big screws I'd break the concrete. So what I did is to use two smaller-sized screws and a couple of washers to hold the tray. Neat, huh?

Go ahead, post your comment below!